

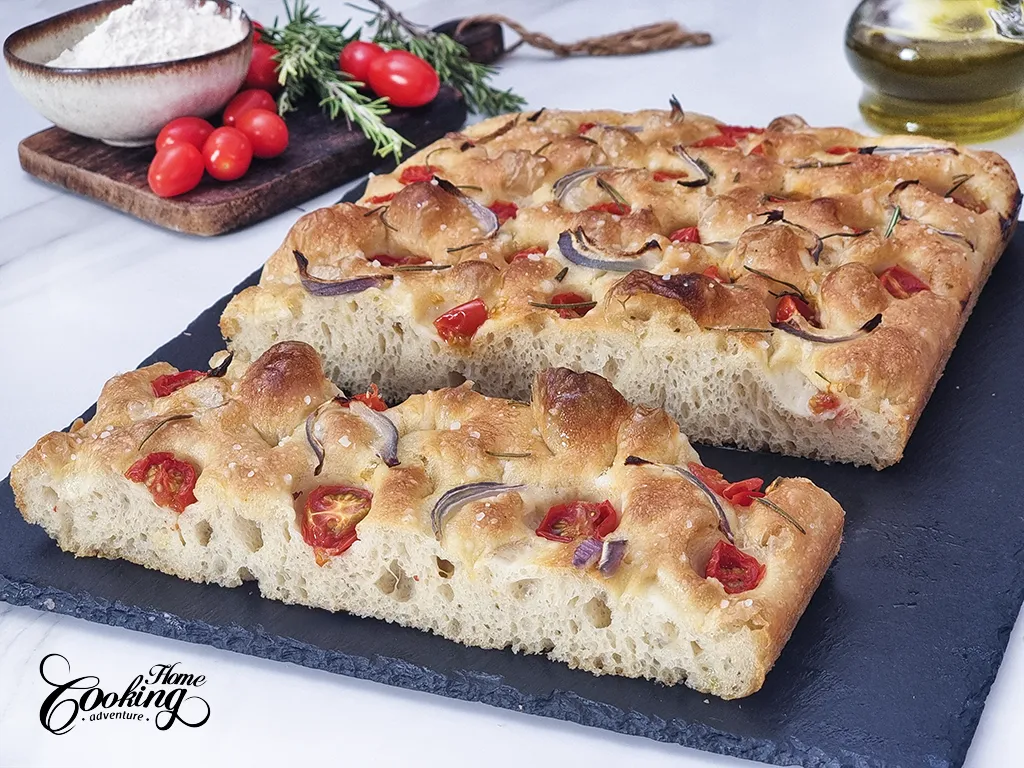
This Easy No-Knead Focaccia is one of the simplest ways to make homemade focaccia. The dough needs no traditional kneading. Instead, a few rounds of stretch and folds followed by a long, slow fermentation develop the gluten and give the bread its soft, airy texture.
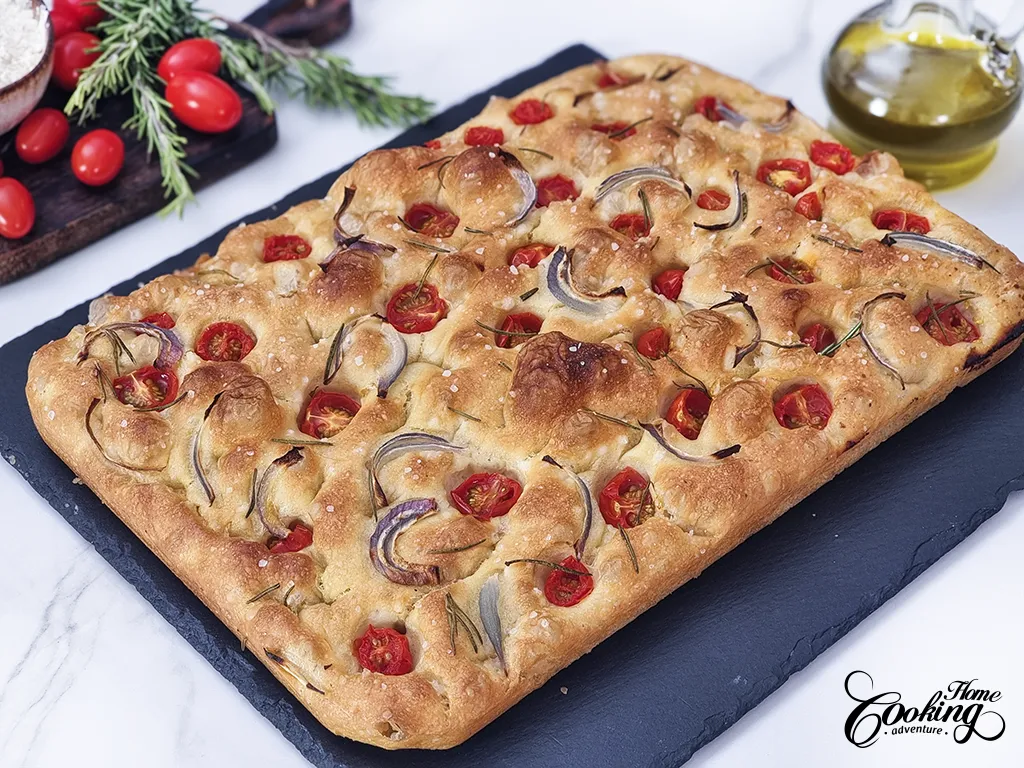
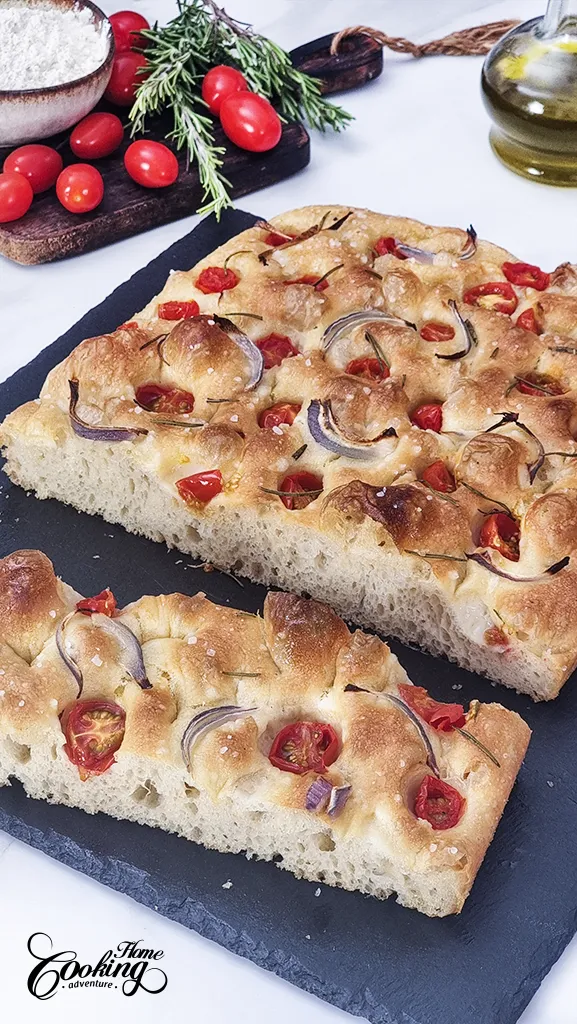
After an overnight rest in the refrigerator, the dough is transferred to a generously oiled pan, allowed to rise until puffy, then topped with more olive oil, cherry tomatoes, red onion, rosemary and flaky sea salt. The result is a golden focaccia with a crispy crust, airy center and plenty of flavor.
Why You’ll Love This No-Knead Focaccia
- No kneading required: A few simple stretch-and-folds are all you need to develop the dough.
- Easy overnight method: Let the dough ferment in the refrigerator while you sleep.
- Soft and airy inside: Slow fermentation gives the focaccia a light, chewy texture.
- Crispy golden edges: Plenty of olive oil helps create beautifully crisp edges and a flavorful crust.
- Easy to customize: Use your favorite herbs, vegetables, olives or garlic for different toppings.
- Perfect for beginners: The dough is forgiving and doesn’t require complicated bread-making techniques.
Ingredients for No-Knead Focaccia
Flour: Bread flour or all-purpose flour both work well. Bread flour can give the focaccia a slightly chewier texture.
Yeast: Active dry yeast provides the rise. The small amount used in this recipe works especially well with the long fermentation.
Water: Room-temperature water creates a wet, sticky dough. Don’t be tempted to add extra flour.
Olive oil: Olive oil is important for both the dough and the pan. It adds flavor and helps create the crispy bottom and edges that make focaccia so good.
Salt: Salt seasons the bread and also helps control fermentation.
Toppings: Cherry tomatoes, red onion, fresh rosemary and flaky sea salt make a simple and flavorful combination. You can easily change the toppings depending on what you have.
Why Does No-Knead Focaccia Work?
Instead of developing gluten through extended kneading, this focaccia relies on time, hydration and stretch-and-folds. The dough rests between each fold, allowing the gluten to develop gradually.
The overnight refrigeration also slows fermentation and gives the dough more time to develop flavor. After the cold rise, the dough gets another 2–3 hours at room temperature to become soft and puffy before baking.
This is what makes the recipe so hands-off while still giving you a focaccia with plenty of structure and an airy crumb.
How to make no-knead focaccia
Begin by activating the yeast in a large bowl with 2 tablespoons of lukewarm water. After 5 minutes, mix in the flour, salt, 1 ⅔ cups (400 ml) of room-temperature water, and 2 tablespoons of olive oil. Gently stir until everything is well combined. The dough will be wet and sticky at this stage. Cover the bowl tightly with plastic wrap to prevent the dough from drying out, and let it rest for 30 minutes.
Perform three sets of stretch and folds at 30-minute intervals. Wet your hands, stretch the dough upward, fold it toward the center, and rotate the bowl 90 degrees. Repeat this process for all four sides.
If you’d like, you can also incorporate the coil fold technique. With wet hands, gently lift the dough from the center and let the ends fold under themselves as the dough coils. Turn the bowl 90 degrees and repeat. This technique adds structure without overhandling the dough.
After the third set, lightly oil the dough, cover, and refrigerate for 12 hours or up to 2 days.
How to bake the focaccia
When ready, grease a 9×13 inch (23-x33cm) pan with olive oil, transfer the dough into it, and let it relax for 5 minutes. Gently stretch the dough towards the edges of the pan. Cover and let it rise at room temperature for 2-3 hours until puffy.
Preheat the oven to 425°F (220°C). Drizzle olive oil over the dough, dimple the surface with your fingertips. The dimples will help trap the oil and any toppings you add. Now, add your favorite toppings like cherry tomatoes, red onion, rosemary, and flaky sea salt. Bake for 25 minutes until golden and crispy. Once baked, allow the focaccia to cool in the pan for 5 minutes before carefully transferring it to a wire rack to cool completely.
Hope you will try it out and enjoy your homemade focaccia! If you do, don’t forget to share the photos with me on Instagram. Would love to see how it turns out for you.
Tips for Making the Best No-Knead Focaccia
- Keep the dough wet. The dough is supposed to be sticky. Adding extra flour can make the focaccia dense.
- Wet or oil your hands when folding. This makes the sticky dough much easier to handle.
- Don’t skip the stretch and folds. They help give the dough strength without traditional kneading.
- Give it enough time to rise. After refrigeration, wait until the dough looks noticeably puffy before baking.
- Use plenty of olive oil. It helps prevent sticking and gives the focaccia its characteristic crispy bottom and edges.
- Don’t press out the air. When stretching the dough and making the dimples, handle it gently to preserve the bubbles that developed during fermentation.
- Don’t rush the cooling. Let the focaccia cool for a few minutes in the pan, then transfer it to a wire rack so the bottom stays crisp.
Focaccia Topping Ideas
You can keep the topping simple or make a different version every time.
Rosemary and sea salt: A classic combination that lets the olive oil and bread shine.
Garlic and herbs: Add thinly sliced garlic with rosemary, thyme or oregano.
Olive focaccia: Scatter green or Kalamata olives over the dough before baking.
Onion focaccia: Add thinly sliced red or yellow onion for a sweet, savory topping.
How to Serve No-Knead Focaccia
Fresh focaccia is delicious served warm alongside soups, salads or roasted vegetables. You can also slice it horizontally and use it to make sandwiches.
Leftover focaccia can be toasted and served with dips, used for sandwiches, or simply warmed in the oven with a little olive oil.
Frequently Asked Questions
Can I let the focaccia dough ferment for longer than 12 hours?
Yes. The dough can be refrigerated for up to 2 days, which gives you flexibility when planning ahead.
Can I make this focaccia without stretch and folds?
The stretch-and-folds help develop strength in the wet dough, so I recommend keeping them in the recipe. They only take a few minutes and are much easier than kneading.
Can I use all-purpose flour instead of bread flour?
Yes. The recipe works with either bread flour or all-purpose flour.
Why is my focaccia not airy?
The most common reasons are not giving the dough enough time to rise after refrigeration, adding too much flour, or pressing too much air out of the dough when stretching and dimpling it.
Can I make focaccia ahead of time?
Yes. The dough itself can be refrigerated for up to 2 days before baking, making this a convenient bread to prepare ahead.
More bread recipes you may like to try
These Twisted Cheese Bagels are a perfect blend of crispy, golden crust and soft, chewy interior, packed with rich, flavorful cheese. These bagels make a delicious treat for any occasion with their flaky texture and savory twist.
Our Homemade Breadsticks are a simple, classic snack perfect for any occasion. Made with bread flour, olive oil, and a blend of herbs and spices, they’re easy to make and always a crowd-pleaser with their crispy exterior and soft, flavorful center.
This Easy Sandwich Bread is a beginner-friendly recipe that offers homemade freshness with minimal effort. Its soft, tender crumb makes it perfect for crafting all kinds of sandwiches, without the need for complicated steps.
For more bread ideas check our full collection of Bread Recipes. If you like sweet bread recipes check our collection of 25 Sweet Bread Recipes.
YOU MAY ALSO LIKE:
Homemade Pretzels
Soft Pretzel Bites
Homemade Crackers
Easy Sourdough Bread
Homemade Cheese Sticks
No-Knead Cheese Bread
Easy Homemade Bread
Greek Yogurt Bagels -No-Yeast
Pumpkin Biscuits
25 Homemade Bread Recipes
The Best Yogurt Flatbreads
Twisted Pumpkin Bagels
Pumpkin Crescent Rolls
Eggless Savory Scones
Classic Focaccia
Knots 4 ways
Basic Sourdough Bread – 1-2-3 Method
Homemade Pita Bread
Video
Easy No-Knead Focaccia
Ingredients
- 4 cups (500g) bread flour or all-purpose flour
- 1 tsp (4g) active dry yeast
- 2 tbsp (30ml) water to activate the yeast
- 2 tsp (10g) salt
- 2 tbsp (30g) olive oil
- 1 ⅔ cup (400ml) water
Instructions
Prepare the dough.
- In a large bowl, add the active dry yeast and 2 tablespoons of lukewarm water. Let it rest for 5 minutes to activate the yeast.
- Add the flour, salt, 1 ⅔ cups (400 ml) water, and 2 tablespoons of olive oil. Mix with a spatula until everything is well combined.
- Cover the bowl with plastic wrap and let the dough rest for 30 minutes.
- After 30 minutes, perform the first set of stretch and folds.
- Wet your hands to prevent sticking. Grab one side of the dough, gently stretch it upward, then fold it over toward the center. Rotate the bowl 90 degrees and repeat the process on the next side. Continue this for all four sides of the dough. (you’ll make a total of 4 stretches and folds)
- Let the dough rest for another 30 minutes.
- Repeat the stretch and fold process two more times at 30-minute intervals, for a total of 3 sets.
- Alternatively, after the first round of stretch and folds, you can use the coil fold technique: Wet your hands, gently lift the dough from the middle, and let the ends fold under themselves as the dough coils into the bowl. Turn the bowl 90 degrees and repeat the same motion. This technique adds structure to the dough without overhandling it.
- After the final set of folds (either stretch and fold or coil fold), spray the dough lightly with oil to keep it from drying out.
- Cover the bowl with plastic wrap and refrigerate for at least 12 hours up to 2 days.
How to bake the focaccia.
- Grease a 9×13 inch (23x33cm) pan generously with olive oil to prevent sticking and add flavor.
- Carefully turn the dough out into the prepared pan. Gently shape it into a rough rectangle without pressing too hard to preserve the dough’s airiness. Let it rest in the pan for 5 minutes, allowing it to relax.
- After resting, use your oiled fingers to gently stretch the dough towards the edges of the pan. Work from the center outward, being careful not to deflate the dough. If the dough resists stretching, let it rest for a few more minutes and try again.
- Once the dough is spread to the edges, cover the pan with a clean kitchen towel or plastic wrap. Let it rest at room temperature for 2 to 3 hours, allowing it to rise and fill the pan. The dough should become puffy and soft during this time.
- Preheat the oven to 425°F (220°C).
- Drizzle olive oil over the surface of the dough.
- Using your fingertips, press into the dough to create dimples all over the surface.
- Now, add your favorite toppings. In this case, top the dough with halved cherry tomatoes, slices of red onion, fresh rosemary sprigs, and a sprinkle of flaky sea salt.
- Bake the focaccia for about 25 minutes until golden brown and crispy around the edges.
- Optional: After baking, drizzle a little more olive oil over the focaccia for extra richness and shine.
- Allow the focaccia to cool in the pan for 5 minutes before carefully transferring it to a wire rack to cool completely. This ensures the bottom stays crisp and doesn’t become soggy.
Nutrition
Did you make this recipe?
Please let me know how it turned out for you! Leave a comment below and tag @homecookingadventure on Instagram and hashtag it #homecookingadventure.


